
Noticing a leak inside your washer can be frustrating for several reasons, including the assumed cost of repairs and the chance of further damage. Therefore, addressing the problem as soon as you notice it is important.
Why is water dripping inside the washer? Water is dripping inside the washer because of a faulty water valve. A broken water valve allows water to drip into the washer even when the washer is not in use.

GE Appliance experts also add that a leaking washer can damage your home if not addressed quickly.
Here is a video showing water that is dripping into a washer drum even though the water is turned off.
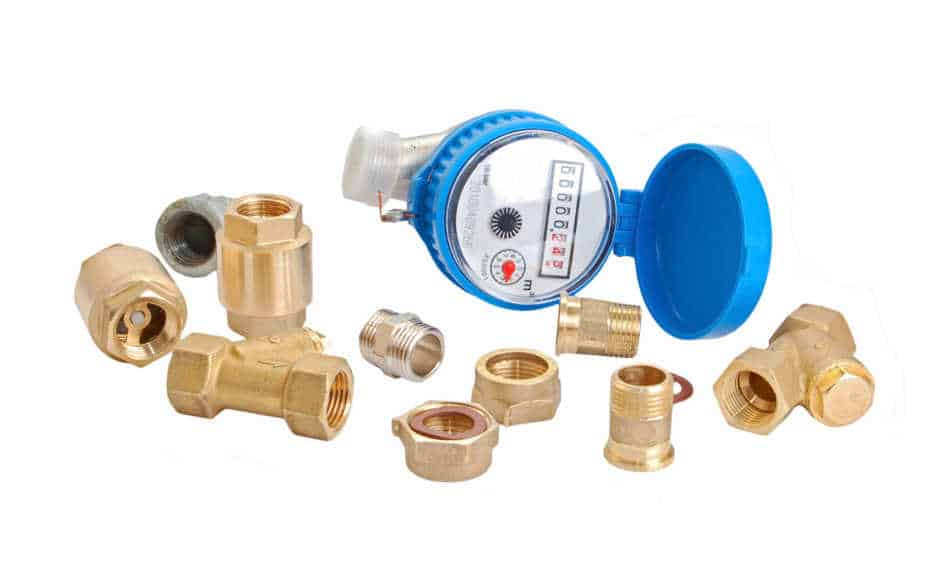
I recommend that you have a spare water inlet valve on hand if you have an LG washer that is available on Amazon. Click here to have yours delivered.
How to Test your Water Inlet Valve that is Causing Water to Drip into the Washer Drum
The best way to test your water inlet valve responsible for water dripping into the washer drum is by running both the electrical and mechanical examination. Completing this process will give you an idea of where the problem with your water inlet valve might be.
Video showing you how to deal with the testing of your water valve.
If water is dropping to the washer drum of your washing machine, there is a high likelihood that the problem may be due to the water inlet valve. Unfortunately, few people know how to address problems related to the water inlet valve in a washing machine.
In this section, we will discuss how you can test the water inlet valve to determine whether it is the reason behind water dropping into the washer drum.
For starters, there are two main ways your valve is not working, either electrically or mechanically. Depending on how your water inlet valve fails, you will need to take two different approaches to test your water valve.
Testing Electrically failed water Inlet Valves
To determine whether the water inlet valve is an electronic failure, you should test each valve coil for continuity to determine whether a continuous electrical path is present. To perform this task, you will need multimeters.
There are two types of multimeters that can test your water inlet valve for continuity, analog and digital. Fortunately, the steps for testing using both multimeters are almost similar. Below are the steps you should follow. I recommend the digital multimeter by Kaiweets that is available on Amazon. Click here to have yours delivered to your front door.

For Analogue Model:
- The first step is to rotate the range selection until it points to the lowest setting for ohms of resistance.
- The next step is calibrating your meter by pinching its probes together and then adjusting its needle to read zero.
- Proceed to the next step, which involves testing your water valve. In this step, you should ensure that you have removed the water valve from the appliance.
- Use the probe of your meter to touch one side of the terminal of the water valve you are testing and the second part to touch the remaining terminal.
- While testing, if you notice that your meter is showing a reading of between 500 to 1,500 ohms of resistance, then the coil has continuity. However, if the number is low or the needle does not move, then your water valve has failed continuity valve and will need to be replaced.
For Digital Model:
- Start by rotating the range selection to point at the lowest setting for ohms of resistance. If your meter has a resistance tone option, then you need to adjust the range selection to point at it.
- Remove the water inlet valve from the appliance.
- Using the probe, touch both terminals of the water valve you are testing.
- The last step is taking the readings, if the meter reads between 500 to 1,500 ohms of resistance, then the coil has continuity. However, if the number is low or the needle does not move, then your water valve has failed continuity valve and will need to be replaced.
Video showing how to use a digital multimeter like a pro:
Testing for Mechanical Defects
Determining whether a water inlet valve has a mechanical defect can be challenging. This section will take you through how to check whether your water inlet valve is defective. Below are some of the steps you should follow.

- The first step should be to confirm sufficient water pressure to the inlet valve. To verify this, you will first need to shut off the water supply, turn off the water (hot and cold) supply lines from the inlet valve and let them drip into a washtub or a bucket.
- The next step is turning the water supply back on and observing whether there is a strong flow of water from the lines. A slow flow indicates water pressure that is low, which is not great for your washing machine. It also points to a problem with your water supply lines or valves. The low water pressure also prevents the inlet from closing properly, resulting in over-filling and water trickling inside the washer when it is not in use.
- If the water coming out of supply lines has intense pressure, the inlet may be restricted and may need a replacement. Cleaning the valve is also not recommended as it increases the risk of part failure after repair.
How to Replace the Water Inlet Valve that is Allowing Water to Drip into your Washer Drum
Replacing a water inlet valve can seem like a complicated process. This section will outline the steps to replace the water inlet valve that is causing water to drip into your washer drum.

- The first thing to do is to disconnect unit connections. In this step, you will be required to disconnect the entire stackable unit, including the dryer vent, discharge hose, electric power connection, and water supply line. In some cases, you may find that you cannot disconnect the discharge hose at the unit because the other end may be semi-permanently fixed to the drain. There is a high likelihood that you will see a lot of sediment build-up at the inlet screen during the disconnection phase.
- The next step will be removing the front cabinet panel to access the water inlet valve. This is achieved by removing screws attaching it to the washer and will be able to expose the inside of the washer, which will get you access to the water inlet valve.
- The next step is disconnecting the water valve connection by removing the screws holding it in the washer. You will need to undo the clips, the two power leads, and other screws holding the water valve inside the washer.
- After undoing the screws holding the valve, the next step is removing the valve assembly.
- The next step is transferring the metal bracket from the old water inlet valve to the new water inlet valve.
- Then you will need to install the new assembly in your washer. To achieve this, you will need to screw the water inlet valve in the same order you unscrewed the old valve. Then you will need to reconnect the valve connections.
- After reconnecting the new water valve inside the washer, you will then need to reattach the front cabinet panel.
- Finally, you can reconnect unit connections, and the process of replacing the water inlet valve will be complete.
How to Replace the Water inlet Valve on a Whirlpool Washer that is leaking from the top into the Drum
Finding out that the water inlet valve on your Whirlpool washer is damaged or faulty can be frustrating. Fortunately, we have prepared a list of steps you can follow to help you fix the problem.
Top Brands of Portable Washer Machines
| Brands of Top Loading Washers that are Portable | Usage |
|---|---|
| VCJ | RV, Dorm, Apartment |
| Auertech | RV, Dorm, Apartment |
| Black&Decker | Apartment |
| Panda | RV, Dorm, Apartment |
| Pataku | RV, Dorm, Apartment |
I recommend the VCJ mini twin tub as a portable top loading washing machine that is available on Amazon. Click here to have yours delivered to your front door.
Before beginning the water inlet valve replacement process on your whirlpool, ensure you have these tools for quick and safe replacement; channel lock pliers, ¼ nut driver, putty knife, and work glove. Let’s begin:
- You should begin by putting on gloves to protect your hands and enlist assistance to move the washer away from the wall.
- After that, unhook the electrical wire from the wall outlet and close the washer’s water supply valves. Move the washer away from the walls at this point to make it simpler for you to access and take out the fill hoses. To prevent confusion later, mark which fill hose connects to the hot connector and which connects to the cold during this phase.
- The fill hoses should be loosened with channel lock pliers until you feel comfortable removing them. You should anticipate some water to spill out at this point. To avoid slipping, you should use a towel to clean up any spilled water.
- The washer needs to be moved forward so you can access the console’s back panel. The top of the console’s rear panel’s screws should be removed.
- The mounting clip must then be released by pushing back on the control panel and slipping a putty knife under the control panel’s right corner. To release the console, repeat this procedure on the left side.
- Detach the wire harness connections, after which you should place the console on the washer.
- The next step is to find the water inlet valve assembly and take out the two hex head screws holding the valve in place. The washer’s water valve should then be removed and laid aside for disposal.
- The new water valve can now be pushed into the old valve’s position to begin the installation process.
- Reinstall the mounting screws after that, and then connect the wire harness to the proper connector.
- Place the console on top of the top panel after that, and then secure the mounting clips. This will support the console’s connection to the top panel.
- The screws should be tightly tightened after being reinstalled on top of the panel. Connect the full hoses to the connectors on the washer’s rear, and then use the channel lock pliers to tighten the connections securely.
- The washer should then be put back to its original location after being plugged into an electrical outlet and the water supply valves turned on. Start to make sure everything is functioning properly.
Can the average homeowner repair a washer with water leaking into the drum?
Chances are, you are wondering if you can repair your washing machine on your own after noticing a leak in the drum. Fortunately, the answer is yes, and the process for such a repair is not complicated either. In this section, we will take you through a step-by-step guide to repairing such a problem.
Interesting read is water shut off valve just spins out of control.
Average Cost of Repairing a Wash Based on Type
| Type of Washer | Average Cost to Repair |
|---|---|
| Front Load | $275 |
| Portable | $150 |
| Steam Washer | $350 |
| Top Loader | $225 |
Items required for repair: You will need a 4-in-1 screwdriver, Hammer, Putty knife, Slip joint pliers, Socket/ratchet set, and an adjustable wrench (Amazon).
- The first step to do is to locate the source of the leak. This will be done by emptying the washing machine, moving it away from the wall, and starting the filling cycle. Then you will need to look for drips around the water supply hose connection at the back of the machine to establish where the leak is coming from. This step calls for identifying all areas that are causing the leak.
- The next step is screwing the water supply: you can start by turning off the water, unscrewing the supply hoses connected at the back with adjustable pliers, and prying out the old hose washers with a flat-blade screwdriver. At this stage, you may even consider installing new gaskets before reconnecting the supply.
- Look inside the machine for any leaks: If you notice that the supply hoses are not the cause of the leaks, consider checking inside to see if you can locate where the leak is coming from and fix it.
- Replace hoses: If you have located the leaking hose from the previous step of looking inside, consider replacing the hose.
- Replace leaky pump: There is also a likelihood that the leak is coming from the pump. In such a case, it will need to be replaced.
- The last step, if everything else fails, is to remove the old pump and replace it with a new one. If this step fails, consider contacting a professional. However, as we have seen from the above simple steps, repairing a washer is a task that an average homeowner can do.
Why is it Necessary to Stop water from Leaking into the Washer Drum
There are several reasons why you can start noticing water leaking into the washer drum. In this section, we will look at some of these reasons and why it is important to stop the leak before the problem exacerbates.
- Faulty parts: A washer with water leaking into its drum is a signal that has faulty parts causing the water leak. To stop this, you will need to first locate where the leak is coming from and then fix it by replacing the damaged parts or repairing them.
- Water coming from water hoses is responsible for the leak: This is also a sign that the connections inside your washers are loose and can result in further damage to your washer.
- Rubber seals not connected properly: Stopping a leak that is happening as a result of a rubber seal leak is necessary. It can also help ensure the problem does not spread to other areas.
- Detergent drawer leak: It is important to stop a leak from the detergent drawer as it may damage your clothes and cause further damage to your washing machine.
- Finally, the washer drain leak can also be dangerous for your washing machine and requires it to be urgently addressed.
Water Pressure that is Too Low Can Cause Water to Drip inside the Washer
You may notice that water has started to drop inside the washer. Although there are many cases of dripping, we will address water pressure as a cause in this section.
For starters, when the water pressure reduces, there is a high likelihood that we may start to see water dripping inside the washer. Although such cases are rare, it does not mean your washer is safe from such a problem.
When water pressure is not enough, there is a high likelihood of the washer overfilling the tub. The result is your load washer leaking and causing the drip inside it. To correct this problem, it is recommended to contact a professional plumber.