I recently had a plumbing issue that left me in need of a plunger. It took some trial and error to understand exactly how to use it, so I thought I’d write up this blog post for anyone else who needs help learning how to use a plunger.
Types of Plungers
Plungers are an essential tool for tackling any plumbing issues that come your way. But did you know there are several diverse types of plungers? From cup plungers to flange plungers and even accordion plungers, it pays to understand the differences between them when it comes time to choose one.
Cup Plunger
The most common plunger is the cup plunger. This type has a wide rubber base that forms a seal around a drain or other pipe opening. It’s often used in toilets, sinks, and bathtubs and works by creating a suction around the blockage so it can be loosened and removed.
Flange Plunger
The second type is a flange plunger. This looks similar to a cup plunger but instead of one wide rubber base, it has two narrow rubber bases connected by a center post. This design is beneficial for longer blockages because the dual bases allow for better pressure on either side of the obstruction.
Accordion Plunger
The third type is known as an accordion plunger. This plunger has several small rubber cups attached together in an accordion shape which makes it ideal for reaching those tricky curved pipes or narrow spaces where traditional cup plungers might not fit.
Each of these three types of plungers plays an important role in keeping plumbing issues at bay, so make sure you have all of them on hand whenever you’re dealing with any clogged drains!
How to Plunge a Tub, Shower, Sink
Plunging a tub, shower, or sink can seem like an intimidating task when you’re tackling a blockage. But with the right steps, you can easily get the job done and have your plumbing working like new! Here’s how:
1. Seal off drains that are nearby to achieve high suction
This will help prevent water from spilling out of the other drains while using the plunger. Placing a wet cloth or rag over a drain is usually sufficient.
2. Block off the overflow drain
Place a wet towel on top of the overflow drain to create an airtight seal before continuing to the next step.
3. Place rubber part of plunger over the clogged drain
If there is a lot of water in the sink or tub, you’ll want to scoop some into a bucket so that it doesn’t spill out while plunging. Then place the plunger directly over the clogged drain and make sure there’s an airtight seal between them for maximum effectiveness.
4. Push downwards on the handle of plunger with quick but steady motions
Do not lift from the surface, as lifting breaks away from your airtight seal and makes it harder for you to plunge effectively! Instead keep making steady downward movements until you feel like something has shifted inside and water begins draining normally again.
With all these steps taken, plunging a tub, shower or sink should no longer be intimidating. Even the kitchen sink can be unclogged using the above steps.
Plunging a Toilet
Plunging a toilet is one of the most common plumbing tasks, but so often people don’t know where to start. To make this task easier, here are the steps you’ll need to take when plunging your toilet:
1. Wait 10 minutes before proceeding
This will give some water time to drain and make it easier for you to remove any blockage.
2. Turn off the water
Locate the hose behind the toilet bowl and turn it clockwise until it shuts off completely.
3. Remove Water
If the bowl is more than half full, scoop out some of the water (but be sure not to completely empty it). If it’s almost empty, add enough water so that it reaches the halfway point – this will help create more suction when plunging.
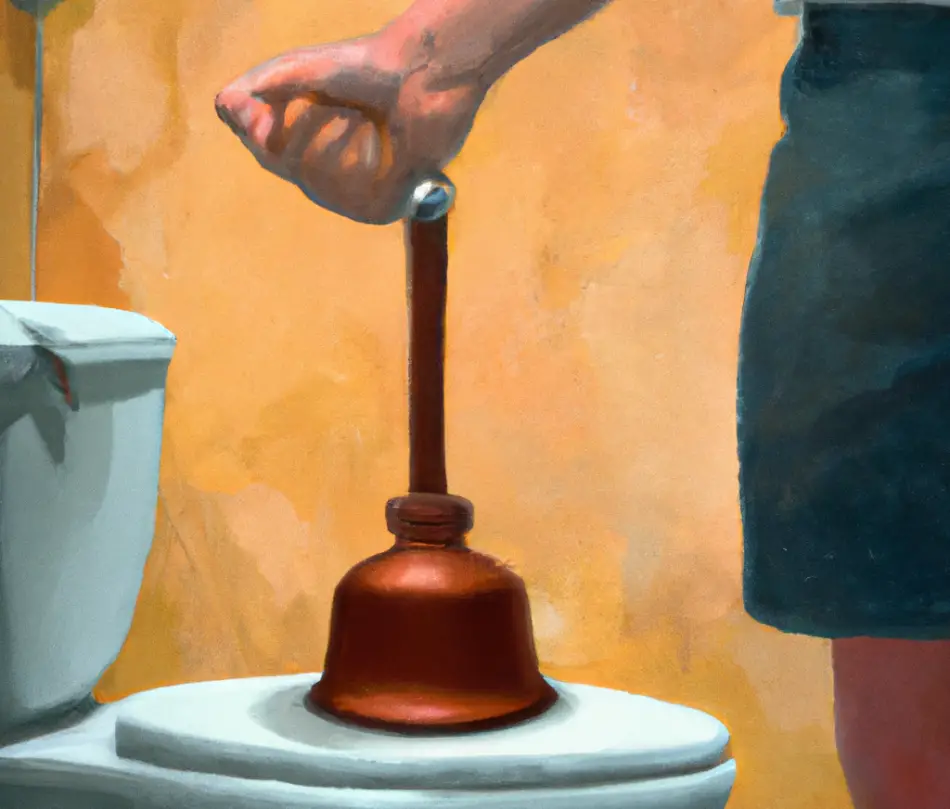
4. Use a Flange Plunger for best results
Extend the end of the flange plunger to its full length and then insert rubber ring into opening in toilet bowl drain. Now push and pull with quick thrusts for about 20 seconds, being careful not to lift up on the plunger as this will break away from your airtight seal and decrease plunging effectiveness.
Usually after 20 seconds or less, you should feel like something has shifted inside and notice that water is beginning to drain normally again.
Once you have these steps down, plunging your toilet won’t seem quite as daunting! With practice you’ll be able to tackle any tricky drainage issues with ease!
What to do When Plunger Fails
We’ve all been there – you’ve tried everything but the clog in your sink or toilet just won’t budge. If a plunger fails to clear the blockage, don’t despair! There are still some other tactics you can try to get your plumbing flowing freely again. Here are a few of them:
Use a Drain Snake
Drain snakes are flexible tools that can be used to remove clogs from drains, pipes and toilets. They come in manual and electric versions and can easily be inserted into the draining system and wriggled around until they grab onto the obstruction.
Use Hot Water and Soap
If the obstruction is caused by excess grease or food particles, hot water and soap may do the trick! Try pouring boiling-hot water down the drain slowly, then following with a squirt of liquid dish soap for maximum effectiveness. Let it sit for about an hour before testing to see if your pipes have been cleared of the blockage.
Use Baking Soda & Vinegar
This natural remedy will hopefully do the trick! Start by pouring half a cup of baking soda down the blocked drain followed by one cup of white vinegar – you should hear it fizzing away as it works its magic on any grime blocking up your drains! Wait 15 minutes before rinsing with hot water to ensure that any residue has been cleared out completely.
Of course, you should always call on a plumber if you’re struggling with persistent issues, but hopefully one of these methods will do the trick in getting rid of those annoying clogs!
How to Use a Plunger with Poop in the Toilet
There’s no denying that plunging a toilet with human feces in it is not the most pleasant thing to do. But if you’re willing to put your nose to the grindstone and arm yourself with the right tools, it doesn’t have to be terrible! Here are some tips for using a plunger when there’s poop in the toilet:
1. I make sure I have the right type of plunger – flange plungers work best for this job as they have extra rubber to form an airtight seal around the opening in the bowl.
2. I unclog it fast – by pushing and pulling quickly with short thrusts, I can create enough suction pressure to move through any blockage quickly and efficiently.
3. I turn to home remedies if necessary – sometimes a plunger alone won’t be enough, especially if the clog is caused by too much human feces. In these cases, I try adding a cup of white vinegar followed by boiling water- this usually helps break down any grime or soap residue that may be causing the clog up inside.
4. I do remember that it takes about 10 minutes for feces to soften and then dissolve in water – though it varies depending on how much solid material there is, in general human feces will take about an hour to completely dissolve in water once flushed down a toilet. Keeping this in mind helps me plan for how long this job will take!
How to Take Care of your Plunger
Taking proper care of your plunger is essential for ensuring it lasts as long as possible and performs at its best. Here are the steps for cleaning your plunger:
1. I add to the toilet bowl three caps full of chlorine bleach – this will help break down any bacteria that may be growing on the plunger.
2. I insert the plunger into the bowl and swirl around for two minutes to let the cleaner do its work – this will also dislodge anything stuck in between the rubber ridges, like bits of hair or lint.
3. I flush the toilet twice to rinse out all traces of bleach from the bowl before swishing a toilet brush around in the fresh water for one minute to make sure everything is clean and disinfected.
4. Finally, I remove my plunger from the bowl and store it on a dedicated toilet bowl holder – this will help keep your supplies together and off the floor!
Do you Push or Pull with a Plunger?
Plunging a toilet is a tricky business. It takes both strength and finesse to get the job done right. The question of whether you should push or pull with a plunger may come up, but the answer might not be what you expect – it’s both! Here are some tips for how to effectively use a plunger to unclog your toilet:
I apply even pressure while pushing – instead of jamming down hard on the plunger, it’s important to maintain even pressure as I push and pull vertically so as not to damage my pipes.
I create suction using the handle – by creating a seal around the opening and then I apply regular pressure, I can help create suction which will help me clear out any blockages from the pipe.
I use leveraged pulling motion- by gripping firmly on the handle of my plunger and using quick pulls upwards, this helps draw water in from the drain upwards and dislodge those stubborn clogs faster than using just pushing motions alone.
By understanding how to correctly push and pull with your plunger, you’ll be able to quickly unclog your toilet.
Do you Flush While Plunging?
One of the most frequent questions asked when using a plunger to unclog a toilet is whether you should flush while plunging. The answer is no! Doing so will interfere with the suction created by the plunger and make it much harder to clear out the clog.
Flushing while you plunge can also lead to overflowing toilets because of the blockage created by the rubber head of the plunger in the drain, which can cause serious water damage to the flooring in your bathroom.
The best way to use a plunger is to create a seal around the drain then apply regular pressure, both pushing and pulling upwards and to remove the plunger from the toilet bowl.
Now is the time to flush the toilet to see if the clog is still there.
It’s important to be aware of how to correctly use your plunger and remember not to flush while plunging.
Can plunging Damage Pipes?
Plunging is an effective way to unclog a clogged toilet or drain, but it can also lead to damage of your pipes if done incorrectly or with too much force. The most common type of damage that could occur when using a plunger is to the drain line itself, which could cause leaks or even break down the connection between the two pieces.
For example, the force used in plunging may be too much for some older plumbing fixtures and can therefore cause damage to the pipes. Additionally, if you’re trying to plunge a shower drain, it’s important to remember not to use too much force – this can push the clog further down the drain line and make it harder to remove.
To avoid damaging your pipes when using a plunger, it’s important to always follow instructions closely and use appropriate pressure for each job. Additionally, remember that some piping materials are better suited for certain types of plunging than others.
Always check with your local hardware store before purchasing a plunger so you know what type of material works best for your job. By taking these precautions, you can ensure that you’re using your plunger correctly and avoiding any unnecessary damage.
Do plungers need water to work?
Plungers are a common tool used to unclog toilets and drains, but you may be wondering if they need water to work. The answer is yes – in order for a plunger to be effective, there must be an adequate level of water present in the toilet or drain.
For an ordinary toilet, the water should cover completely the rim of the plunger and come up halfway up the brim of a toilet bowl. This will help create an airtight seal so that when you plunge, the air is expelled and creates suction necessary to break up clogs.
If you have a stiff plunger that won’t create enough suction, it’s a clever idea to soak it in water first to soften it up. Once softened, apply regular pressure both pushing and pulling upwards when plunging to draw out as much water as possible from the clogged area. With these tips, you can ensure your plungers are working optimally!
Conclusion
Ultimately, having the right tools and approach to tackle a plumbing issue can make all the difference. Plungers come in several forms, including cup plungers, flange plungers and accordion plungers, each suited for diverse types of blockages. When it comes to plunging a tub, shower, or sink, it’s important to make sure you’re creating an airtight seal with your plunger and making quick but steady motions with your handle.
Plunging a toilet is similar but requires you to wait 10 minutes beforehand before turning off the water and removing some of the bowl’s water if half full or more. Lastly, for best results use a flange plunger on a toilet bowl. With these steps in mind, even those less experienced with plumbing tasks can easily unclog any drain or toilet!
